By choosing the right time, knowing a few basic principles, and focusing on quality over quantity, your images will create a beautiful record of your adventure in Africa. Whether you’re bringing the most expensive, mirrorless camera, digital SLR and telephoto lenses or just your smartphone, it’s not about the gear—it’s about how (well) you use it. Remember, going on safari is not the time to wear new shoes, show off expensive luggage, or try out a new camera.
Prepare
- Practice before your trip so you’re confident when the moment arrives. Visit your local zoo or take photos of your pets in motion!
- Have extra batteries, memory cards, and a padded case for your camera.
- Bring a portable charger (or two) for your phone.
- A dry bag is great for protecting gear on dusty trails or during sudden showers.
- Don’t rely on a single memory card. Use an external hard drive, or back up to the cloud whenever Wi-Fi is available. Make it a habit to back up daily.
- Purchase a Universal Power Strip – you can use it on all your trips, just bring the right adapter for the county you are visiting!
- Bring extra adapters to re-charge your batteries (we specify which ones to pack for all our clients).
Stay Cautious, Stay Safe
- Listen to your guide’s instructions and advice. Never get too close or disturb animals for the sake of a photo. Never endanger your safety or that of those around you. Never lose patience, respect, or common sense.
- Silence is golden. Keep in mind that others on your vehicle may be filming video. Most smartphones and digital cameras have silent/mute settings so that a video of an elephant passing by doesn’t have to sound like someone walking the red carpet on Oscar night.
- Always ask for permission before photographing people. That includes your fellow guests.
- Resist the urge to start sorting and editing your images while you’re on a game drive. There will be plenty of time for that at camp or on your flight home.
Time of Day
- Golden Hour – the period just after sunrise and just before sunset—is a favorite among photographers for good reason. This magical time bathes the landscape in soft, warm light that’s ideal for everything from sweeping savannahs to intimate wildlife portraits. Shadows are long, contrast is gentle, and colors truly shine.
- Blue Hour – occurs just before sunrise or just after sunset, offering a cooler, moodier light than Golden Hour. This short window produces atmospheric skies and dramatic silhouettes—perfect for photographing animals, water reflections, and wide-open landscapes. It’s brief but beautiful, so be ready.
- Midday – midday light, from around 11 a.m. to 3 p.m.—is often too harsh. Shadows become unflattering, colors wash out, and detail gets lost. Instead, use this time to explore, observe, or relax. If you do shoot, seek shade to soften the light or embrace black-and-white photography to turn harsh contrast into an advantage
Composition:
- Rule of Thirds: Place your subject off-center, along the lines or intersections of a 3×3 grid. This creates balance and draws the viewer’s eye naturally across the frame—especially effective against Africa’s dramatic landscapes.
- Lead-In Lines: Use natural elements like dirt roads, rivers, or animal trails to guide the viewer’s gaze through your image. This adds a sense of movement and storytelling.
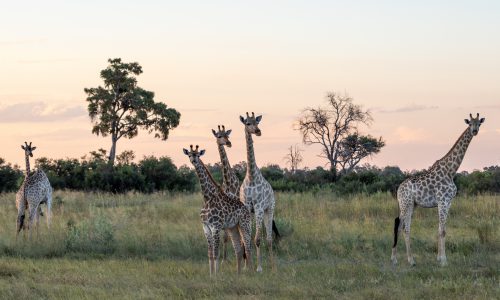
- Embrace wider shots for context and scale. A lone Acacia tree on the Serengeti plains or a herd of elephant beneath Mount Kilimanjaro tell a much bigger story.
- Layer Your Shots: Create depth by including foreground (like grasses or rocks), middle ground (your subject), and background (mountains, sky, or trees). This makes your photos feel three-dimensional and immersive.
- Be Patient: Great wildlife photography often comes to those who wait. Pause. Watch. Let the scene unfold. That extra moment may reveal a cub emerging, a lion’s yawn, or a giraffe’s graceful neck silhouetted against the setting sun.
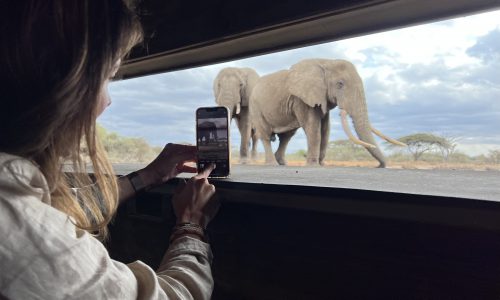
Smartphone Users
- Turn on the grid feature (Settings > Camera > Grid) to help with composition. (See rule of thirds above)
- Adjust Exposure: Tap and slide up/down on the screen to brighten or darken your shot.
- Resist the impulse to Zoom: Crop later to maintain image quality.
- Consider portrait mode for clean subject focus and a soft, blurred background.
- Put your smartphone on raw photo setting if available. Raw files preserve the original data captured on a camera’s sensor and allows for greater flexibility when editing
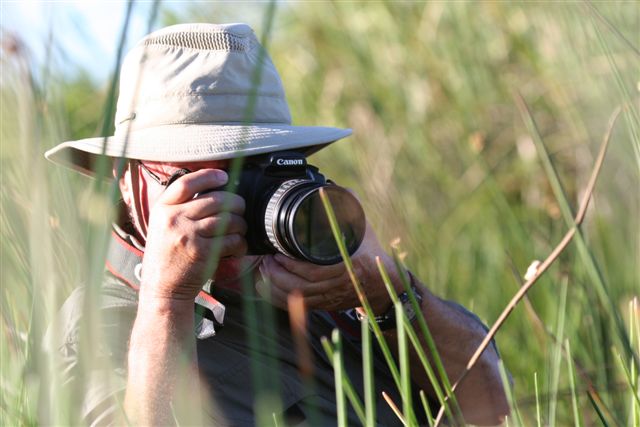
Digital Camera Users
- Aperture Priority (Av or A Mode): Use a wide aperture (f/2.8–f/5.6) for shallow depth of field.
- Shutter Speed: Go fast (1/1000s or more) to freeze action, especially birds or running animals.
- Continuous Focus (AI Servo/AF-C): Keep moving subjects sharp and in focus.
- Use a monopod or rest your camera on a surface to stabilize your shots and avoid motion blur.
- Lens selection – depending on your camera brand aim for 70 or 100 to 400, 500 or 800, and wide angle for landscape and sunrise and sunset shots
- Consider renting a lens from your favorite camera store at home, or ask us if it’s possible to rent onsite at the safari lodge, or in a nearby town you may be passing through.
It’s easy to get caught up in capturing every mammal, moment, and movement but put the camera down and take it all in occasionally. Some of your best memories of Africa will be of sights, sounds, smells and sensations that cannot be condensed into a single image.
Thanks to our contributors – local wildlife photographer Deirdre Corcoran and African Portfolio veteran Keri Frankenstein – for their input.
If you’ve travelled with us recently, ask about our photo contest! If you’re planning a safari – contact us!